Saturday, 1 February 2014

February Calendar Journal Page

Hi Everyone hope you all have been keeping well in this cold weather!  I hope that summer comes soon LOL.
I have my sister visiting me this month for a few days (I was at hers last month) and we did our calendar pages together again - however in my rather cramped corner of a small room rather than her lovely large roomy airy new craft room.  But despite the cosy quarters we still both managed to come up with a great calendar page each.
This is my effort for the month of February. 
Most people think of valentines day when they think of February but to be honest I find it the most dismal month of the year. After all the festivities over Christmas and New Year, then I have my birthday to celebrate the middle of January, then comes February!! So to say I always feel flat this month wouldn't be understating the issue and to top it all usually the weather is miserable and cold!! Ok moan over LOL!
So I think my page this month rather reflects my feelings toward the month. The dark and dreary background is a great backdrop for the hope of the coming spring!!!
Don't get me wrong, I didn't plan it that way, its just the way it turned out!!!


I started this month knowing that I wanted to do some sort of shadow box so that seemed like a good place to start.
I inked a spare piece of paper with Dylusions sprays and did some water splatters on in and dried it off.  I then cut it into 1.5" squares and drew on my inner lines to create the illusion of the inside of a box.  Then I used Black soot distress ink pad and a black pan pastel to darken the intner surfaces!!  I was well pleased with this as a start but was stumped as to what do for the background.  Obviously with my day squares being so bright I wanted a contrast so ended up spraying black and brown Dylusions inks onto my page and sprinkled it with rock salt!!  I love this technique every time I use it!! then as it was drying Ispritzed some perfect pearls mica spray over the top.  I finished drying it with the heat tool and gently brushed off the salt!!


For what was suppose to be a dreary background it ended up looking rather lush!! Isn't it always the way!
So I glued my squares in place and was rather pleased with the effect.  
Then it was a case of finding a focal point and that's where this lovely character from Rick St Dennis digi downloads came in.
I Coloured her (well I think of it as a her!?!?!) with inktense pencils and various other colour pens so that she was bright and cheerful! (A quick layer of glossy accents on the eyes is always a lovely finishing touch!)
Last but not least was the stamps for the month and year and I used the lovely sets from Tim Holtz but didn't want them too in your face so did them in black archival and outlined them lightly in white.
I had thought to put more on - my usual quote and other embellishments but I decided in this case that less was more.  
So come on February - bring it on!!!!
xxxx hugs xxxx


Sunday, 5 January 2014

Calendar Journal Page January 2014!

Hi every one Happy New Year!!!  I hope it has started off well for you all!
I was lucky enough to spend Christmas and New Year at my sisters in Devon and we finished the year in a perfect way by doing our January journal pages together in her new craft room on the last day of the year!!
It was a great plan and my sister got stuck into doing her page, as she knew what she wanted to do but I struggled yet again.  I didn't really have any firm ideas of what to do (apart from the torn paper day blocks) and working in some one Else's craft space is odd as you don't know what they have in the way of crafting stuff!!!
So I wasted quite a lot of time having a look at what she had and hoping that inspiration would strike, but an hour later and I was still messing around and hadn't so much as dirtied the paper!!!
So taking myself firmly in hand I decided to use some scrap paper and just get some ink layed down!!
So this is what I finally produced!
So to get me started I did the sheet for the day spaces, I inked, stenciled, stamped and generally got messy and had a good time having no idea where I was going.  Once that was dry I tore the page into strips and inked the edges.
Still nothing was springing to mind as to where to go from there!! 
So yet again I wasted quite a bit of time moving the day spaces around on the sheet to try and decide how I was going to lay they out.  They looked so nice piled on the table that I though I would try and do something like that on the page.
However before that I needed to do the background so out came the inks again and I sprayed, stenciled, splattered and dripped and came up with a background I was happy with, adding a bit of ink blended round the edges to finish it off. 
Having got this far I was stumped as to what to use for a focal point to wandered of to have a coffee!!! LOL
While enjoying my coffee my eyes landed on my Christmas goody stash and sitting on the top of the pile was this bottle Die, christening it seemed like the way to go.
So I cut out the bottles in canvas and coloured them using distress ink pads and stabilo write all pencils.  
I had come across quite a few quotes over Christmas that I liked and wanted to use but this one seemed the most appropriate to the way I was feeling.
So firing up my sisters computer I printed the labels, quote and the Jan & 2014 sign, with a hasty prompt from Julie to make is 2014 not 2013 LOL! and inked the edges.
So finally with much stopping and staring and general prating around I managed to put the page together, finishing off with some shadows round the day spaces and highlights on the bottle.  I was going to put crackle glaze over the bottles to make them look more like glass but I like them as they were, so used the glaze on the 2 signs instead!!
Much to my surprise, after not really getting into the whole thing I ended up with a page that I was really pleased with.  
I'm hoping that I will manage to get a few more projects done at home in my own craft area this year so that I don't struggle so much with the lack of mojo!!!
Wish me luck!!
Have a happy crafty year!!
XXXhugzXXX

Wednesday, 25 December 2013

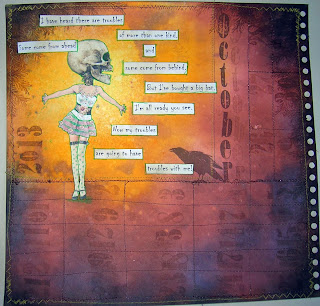
A year of calendar pages 2013

Hi I was looking through the calendar pages for this year and was really pleased that I have kept it going for the second year.  
So I thought I would do a quick recap of the all 12 months.
Hope you have enjoyed seeing my efforts and that you have had a go yourselves.
Enjoy!!!


If you would like to join in the Calendar journal challenge you can find details on Kate Cranes blog here and you can see the facebook group here.

I hope 2014 is a wonderful, creative Happy Year for you all!!!
xxxxxxxxxxxxxxxxxxxxxxxxxxxxxxxxxxxxxxxxxxxxxxxxxxxxxxxxxxxxxxxxxxxxxxxxxxxxxxxxxxxx


Thursday, 5 December 2013

December Calendar Journal Page

Hi folks!!!
Well so much for last months plan to catch up on writing the posts for the projects I have made at classes over the last few months!!
As always life gets busy at this time of year for all of us and some things just don't get done!
This months calendar page is evidence of that.  
My intentions of getting it done early, so that I wouldn't be rushing last minute, went out the window.
I haven't had much time recently to do any creating at home and I think if I don't do some regularly I get out of the habit and when I go back to it, its much harder as the Mojo has sunk out of sight!!
So I started this months page on the last day of November thinking I would get it done that day.  Didn't happen, as life got in the way, and it took until today to get back to it.  So I have been thinking about it and planning it too much in the mean time!!  Another sure fired way for me to block my mojo!
I find I work best if I just sit down and see what happens, If I don't like what happens I keep at it until I get it to work.  Definitely the case this month!! Lol 


I decided I wanted to make it Christmasy, so sprayed the back of last months page with black, blue and white Dylusions ink sprays!!  The page already had marks and some paint on it from when I did Novembers page (on the other side) but that doesn't bother me and I think it adds to the effect.
I thought I would try adding some more depth to the background using black pan pastel and a torn sheet of paper to create the illusion of hills.


I loved the background as always and that's where I stopped on the first day.  I tried to get back to it a few times but had no clue where to go next.
Finally I saw a picture of some snowballs and that sparked off the idea.
I wanted to draw the pile of snowballs directly on the background rather than cut them out and stick them on but I realised that with the sprays being reactive to water, know matter what I used to paint or draw the snowballs with would either end up mixing this the background colour or not being strong enough to cover the blue.  So like it or not they had to get drawn on to paper and stuck on.
I used Matt medium to stick the paper down and went over it with thin coat as well.  Again a problem occurred to me, some of the things I tried to colour the snowballs in with made it impossible to write on and as these will be my day spaces and I will fill them in this was an issue.
Finally I painted over all of the snow with Golden paint in white, and that seemed to sort it.
I then went round the snowballs with a stabilo write all black pencil and used a water brush to blend it to create more shadow and depth.  I then used some more black pan pastel to smudge over the edges to try and help with the illusion of shape.
I stamped a tree down the edge using a small branch stamp and archival ink.
I cut the sign out of grunge paper and coloured it with the brown Dylusions ink spray and used a brown pen to draw in some graining.  I printed the lettering on the computer and used the antique linen distress ink pad to mute the colour and vintage photo to blend over the edge of the sign and the whole page.
Lastly I added some small dots of stickles and used an ice pen to create the icicles (they weren't totally dry when I took the picture so it does end up clear).
This morning I was ready to give up on it as I was really struggling but as I have done each pages for the last 23 months it seemed a shame to give up now.  Not my favourite page but certainly different and I used a few things that I haven't before.
I hope you all have a great month!!
Take care
xxxHUGZxxx

Monday, 11 November 2013

Steampunk spells starbook

Hi guys just a quick post to touch base and say 'Hi' hope your all having a good November so far.
As promised in my last post here is a quick show of pictures of one of the classes I did last month at AFTH.
This one was a Halloween feel star book with Dy!!!
Love making these books and the wonderful Graphic 45 Steampunk spells paper is great to work with.  


I didn't manage to get it finished in class but I wasn't far off.  Just needed some ribbon added and a little bit of doodling!!! 
It was a great day!!
Happy creating folks!!!
xxx hugs xxx


Sunday, 3 November 2013

Journal day

Hi everyone hope you are all having a good November!!
Over the last few months I haven't done any journal pages at home, apart from my calendar pages. I just don't seem to have been up for it, i think my Mojo went walk abouts!
  I have managed to do a few classes which I have really enjoyed andI'm hoping over the next few weeks to finally get round to blogging some of them.
My last class was my journaling  at AFTH, and I finally got a page finished!!!  Yeah!!!


We did some secret journaling on this one so I ended up doing loads of writing but you just cant see it LOL!
I also managed to do a bit more to a couple more pages, so they are works in progress.


 This one has been in my journal for a while with the stamping on it as it was a secondary stamping from one I did on another page.  I just blended on some distress inks and splattered with water.  For some reason it feels Christmasy to me!!!! Oh well will see how it turns out when ever I get back to it.


This one is any inky background with some stencilling and white ink splattered and is now set up for some secret journaling.

So Im really hoping that this will help me find my mojo in my own craft room and get some journaling done!!
Hope you all find something that inspires you this month to be creative!
xxx hugs xxxx


Friday, 1 November 2013

November Calendar Journal Page

 Hi everyone - well the year is speeding past way too fast as normal.  Less than 8 weeks to Christmas - not that I'm trying to add to your stress or anything!! LOL!
Here's my November calendar journal page!!


When I started this at the beginning of the month I didn't really have any idea as to what I was going to do apart from the fact that I wanted to do mixed media on it.  I have been to a couple of classes in the last couple of months where we have layered up all sorts of different things to create a texture and I wanted to have a go at it myself at home. 
So I coated the page up with gesso using a scrapper (well in my case an old credit card) and left it quite rough.  Over this I randomly stuck down some lace curtain material, strips of me fix medical tape, Tim Holts tissue paper and and off cut of card which had a pattern punched into it.  Once the layers had dried I brushed on another light coat of gesso.
Once that  had dried Iadded some Dylusions ink sprays and some Fireworks mica sprays.  I sprayed some water on to get it dripping down the page and dried it off with the heat tool. It took quite a bit of drying as the background wasn't very absorbent.
In my paper stash draw (well its 2 actually - as I don't throw anything away) I found the embossed tree tag which I did a while ago and never used on the project it was intended for, a torn piece of embossed card and some tags, so I layered them up and glued them in place.
In my stamp draw I found this unused Octopode factory stamp and though he would work nicely as the focal point.  I coloured him using Inktense pencils and Dylusions ink and glued him on the front.
The date spaces were stamped in archival ink using a Tim Holtz stamp and I added some work stamping on the background.
The final touch was some doodling and blending some ink round the edge of the page with an ink blending tool.
I have to say as I only managed to do this in 10 minute slots, each time I returned to do a little more it changed direction, every time, so I'm quite pleased that I managed to pull it all together and make it work.
I will have to be careful what pen I use to write on it as most pens will smudge on this gesso surface.  
So all in all pleased with the result and I'm pleased that I had a go at the mixed media layering!!
Have a great month.
XXX hugs XXX