Thursday, 5 December 2013

December Calendar Journal Page

Hi folks!!!
Well so much for last months plan to catch up on writing the posts for the projects I have made at classes over the last few months!!
As always life gets busy at this time of year for all of us and some things just don't get done!
This months calendar page is evidence of that.  
My intentions of getting it done early, so that I wouldn't be rushing last minute, went out the window.
I haven't had much time recently to do any creating at home and I think if I don't do some regularly I get out of the habit and when I go back to it, its much harder as the Mojo has sunk out of sight!!
So I started this months page on the last day of November thinking I would get it done that day.  Didn't happen, as life got in the way, and it took until today to get back to it.  So I have been thinking about it and planning it too much in the mean time!!  Another sure fired way for me to block my mojo!
I find I work best if I just sit down and see what happens, If I don't like what happens I keep at it until I get it to work.  Definitely the case this month!! Lol 


I decided I wanted to make it Christmasy, so sprayed the back of last months page with black, blue and white Dylusions ink sprays!!  The page already had marks and some paint on it from when I did Novembers page (on the other side) but that doesn't bother me and I think it adds to the effect.
I thought I would try adding some more depth to the background using black pan pastel and a torn sheet of paper to create the illusion of hills.


I loved the background as always and that's where I stopped on the first day.  I tried to get back to it a few times but had no clue where to go next.
Finally I saw a picture of some snowballs and that sparked off the idea.
I wanted to draw the pile of snowballs directly on the background rather than cut them out and stick them on but I realised that with the sprays being reactive to water, know matter what I used to paint or draw the snowballs with would either end up mixing this the background colour or not being strong enough to cover the blue.  So like it or not they had to get drawn on to paper and stuck on.
I used Matt medium to stick the paper down and went over it with thin coat as well.  Again a problem occurred to me, some of the things I tried to colour the snowballs in with made it impossible to write on and as these will be my day spaces and I will fill them in this was an issue.
Finally I painted over all of the snow with Golden paint in white, and that seemed to sort it.
I then went round the snowballs with a stabilo write all black pencil and used a water brush to blend it to create more shadow and depth.  I then used some more black pan pastel to smudge over the edges to try and help with the illusion of shape.
I stamped a tree down the edge using a small branch stamp and archival ink.
I cut the sign out of grunge paper and coloured it with the brown Dylusions ink spray and used a brown pen to draw in some graining.  I printed the lettering on the computer and used the antique linen distress ink pad to mute the colour and vintage photo to blend over the edge of the sign and the whole page.
Lastly I added some small dots of stickles and used an ice pen to create the icicles (they weren't totally dry when I took the picture so it does end up clear).
This morning I was ready to give up on it as I was really struggling but as I have done each pages for the last 23 months it seemed a shame to give up now.  Not my favourite page but certainly different and I used a few things that I haven't before.
I hope you all have a great month!!
Take care
xxxHUGZxxx

Monday, 11 November 2013

Steampunk spells starbook

Hi guys just a quick post to touch base and say 'Hi' hope your all having a good November so far.
As promised in my last post here is a quick show of pictures of one of the classes I did last month at AFTH.
This one was a Halloween feel star book with Dy!!!
Love making these books and the wonderful Graphic 45 Steampunk spells paper is great to work with.  


I didn't manage to get it finished in class but I wasn't far off.  Just needed some ribbon added and a little bit of doodling!!! 
It was a great day!!
Happy creating folks!!!
xxx hugs xxx


Sunday, 3 November 2013

Journal day

Hi everyone hope you are all having a good November!!
Over the last few months I haven't done any journal pages at home, apart from my calendar pages. I just don't seem to have been up for it, i think my Mojo went walk abouts!
  I have managed to do a few classes which I have really enjoyed andI'm hoping over the next few weeks to finally get round to blogging some of them.
My last class was my journaling  at AFTH, and I finally got a page finished!!!  Yeah!!!


We did some secret journaling on this one so I ended up doing loads of writing but you just cant see it LOL!
I also managed to do a bit more to a couple more pages, so they are works in progress.


 This one has been in my journal for a while with the stamping on it as it was a secondary stamping from one I did on another page.  I just blended on some distress inks and splattered with water.  For some reason it feels Christmasy to me!!!! Oh well will see how it turns out when ever I get back to it.


This one is any inky background with some stencilling and white ink splattered and is now set up for some secret journaling.

So Im really hoping that this will help me find my mojo in my own craft room and get some journaling done!!
Hope you all find something that inspires you this month to be creative!
xxx hugs xxxx


Friday, 1 November 2013

November Calendar Journal Page

 Hi everyone - well the year is speeding past way too fast as normal.  Less than 8 weeks to Christmas - not that I'm trying to add to your stress or anything!! LOL!
Here's my November calendar journal page!!


When I started this at the beginning of the month I didn't really have any idea as to what I was going to do apart from the fact that I wanted to do mixed media on it.  I have been to a couple of classes in the last couple of months where we have layered up all sorts of different things to create a texture and I wanted to have a go at it myself at home. 
So I coated the page up with gesso using a scrapper (well in my case an old credit card) and left it quite rough.  Over this I randomly stuck down some lace curtain material, strips of me fix medical tape, Tim Holts tissue paper and and off cut of card which had a pattern punched into it.  Once the layers had dried I brushed on another light coat of gesso.
Once that  had dried Iadded some Dylusions ink sprays and some Fireworks mica sprays.  I sprayed some water on to get it dripping down the page and dried it off with the heat tool. It took quite a bit of drying as the background wasn't very absorbent.
In my paper stash draw (well its 2 actually - as I don't throw anything away) I found the embossed tree tag which I did a while ago and never used on the project it was intended for, a torn piece of embossed card and some tags, so I layered them up and glued them in place.
In my stamp draw I found this unused Octopode factory stamp and though he would work nicely as the focal point.  I coloured him using Inktense pencils and Dylusions ink and glued him on the front.
The date spaces were stamped in archival ink using a Tim Holtz stamp and I added some work stamping on the background.
The final touch was some doodling and blending some ink round the edge of the page with an ink blending tool.
I have to say as I only managed to do this in 10 minute slots, each time I returned to do a little more it changed direction, every time, so I'm quite pleased that I managed to pull it all together and make it work.
I will have to be careful what pen I use to write on it as most pens will smudge on this gesso surface.  
So all in all pleased with the result and I'm pleased that I had a go at the mixed media layering!!
Have a great month.
XXX hugs XXX


Thursday, 10 October 2013

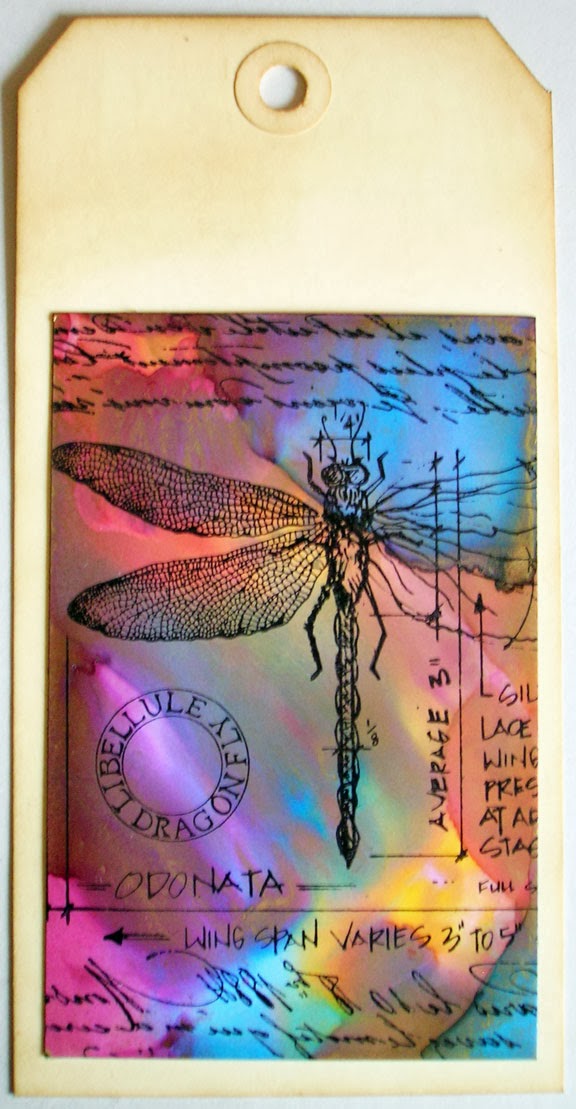
CC102 & Alcohol Inks

Hi guys - well I have surprised myself - 3 posts in one week!!! Don't faint, I probably wont happen again.
I have taken some time this week to sign up and do Tim Holtz Creative Chemistry 102.  I did 101 last year and totally love it so it was a no brainer for this one!!
If you have done 101 and haven't signed up for 102 get yourself over to this link Creative Chemistry 102.  Its $25 dollars which works out at about £17 and totally worth the money.
I haven't used the alcohol inks much apart from on the jewellery I posted earlier on this week.  I couldn't really get any nice results which I thought I could use on any of my projects!!!
Well today's class was all about alcohol - inks not drinks!! 
I totally love some of the things I have done with them.
My nod to Halloween!
Loved the colours on this one but the camera doesn't pick up all the gold!
They are much nicer in real life as they shine and shimmer!
I have made all of my attempts into tags so that I end up with a tag technique book so I haven't finished them off but I think they it wouldn't take much to finish them off and they would look so cool!
Hope you try something new this week while creating.
Have fun xxxx

Wednesday, 9 October 2013

Alcohol Ink Jewellery!

Ok guys just another quick post this week.  
One of the groups I'm in does a monthly challenge and this month its based on using Alcohol inks.  
So here is something different I have done with the inks.
I made some clay Jewellery pieces and fired them in the kiln to 1250 degrees.  
Then coloured them with neat alcohol ink and sealed them.
What do you think?


I might try some more unusual shapes next time and use them on a canvas!


Have fun and try something different this month with supplies you already own!!
xxx hugs xxx

Tuesday, 8 October 2013

October Calendar Journal Page - LATE!

Hi everyone - here is me finally managing to finish and blog Octobers journal calendar page.  So say I'm behind is an understatement!! Ive been a bit stressed and tasks have been falling by the wayside but I was determined to get this finished and filled in up to date!
So today all other jobs have had to wait till I got this finished.
So here is the masterpiece LOL!  I wish!!
Ok I did a nice ink spray background at the beginning of last month and then it sat there not touched for weeks.  
I got some fab downloads off Deviant Scrap and this lovely lady was out of one of the collections by Xquizart - ok she did come with a pretty head, which I mercilessly cut off and replaced with the skull!!!! It suited my mood better!
I then stamped round the top edges with a foliage stamp and decided that I wanted to do some stitching on it.  So out came my very old sewing machine which seemed determined to eat or snap the thread, but after 30 frustrating minutes I managed to get the edging and the day shapes done.
Some stamping with Tim Holtz alphabet stamps and his bird gave it a nice subdued looked.
I came across the quote by Dr Seuss and I fell in love with it and thought it would go on this page very well.
So with the quote and the figure stuck on and some green outlining it was done.
I can believe how much I like it - it felt like such a struggle getting it done that I got to the stage where I didn't care what it looked like I just wanted it finished.  
I guess that goes to the state of mind it was in!!!
As always I was helped through the process by my 2 cats,  Mishka and Marble.
  (Mishka was even determined to get into the act when I was trying to photograph it!!)

Don't you just love all the help you get!!! LOL
Have a great week and I hope your creativity flows this month!!
Take care
XXXXXXXXXXXXXXXXXXX